A Trio of Thermaltake Towers
by Joshua Buss on August 16, 2006 2:30 AM EST- Posted in
- Cases/Cooling/PSUs
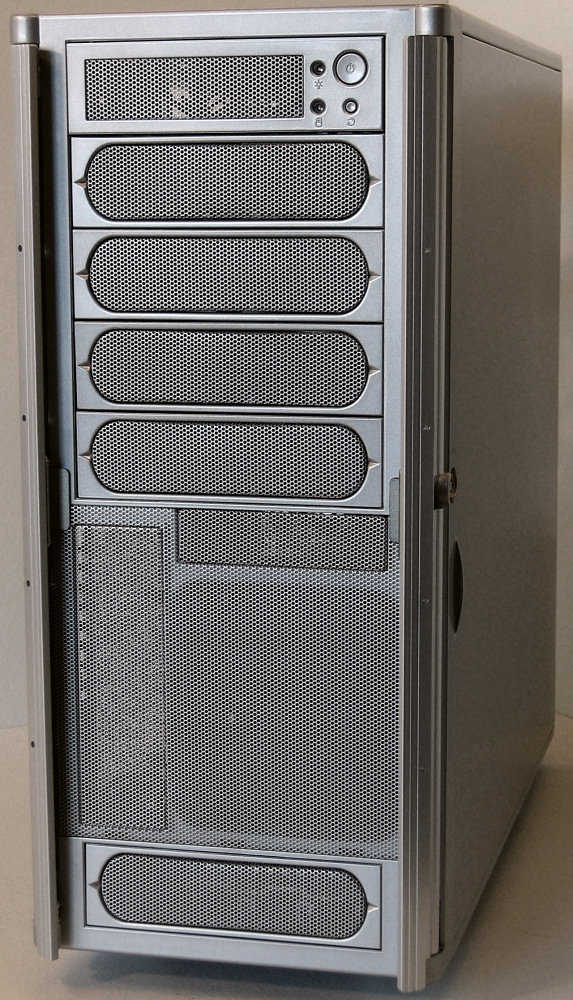
Thermaltake Aguila - External and Internal
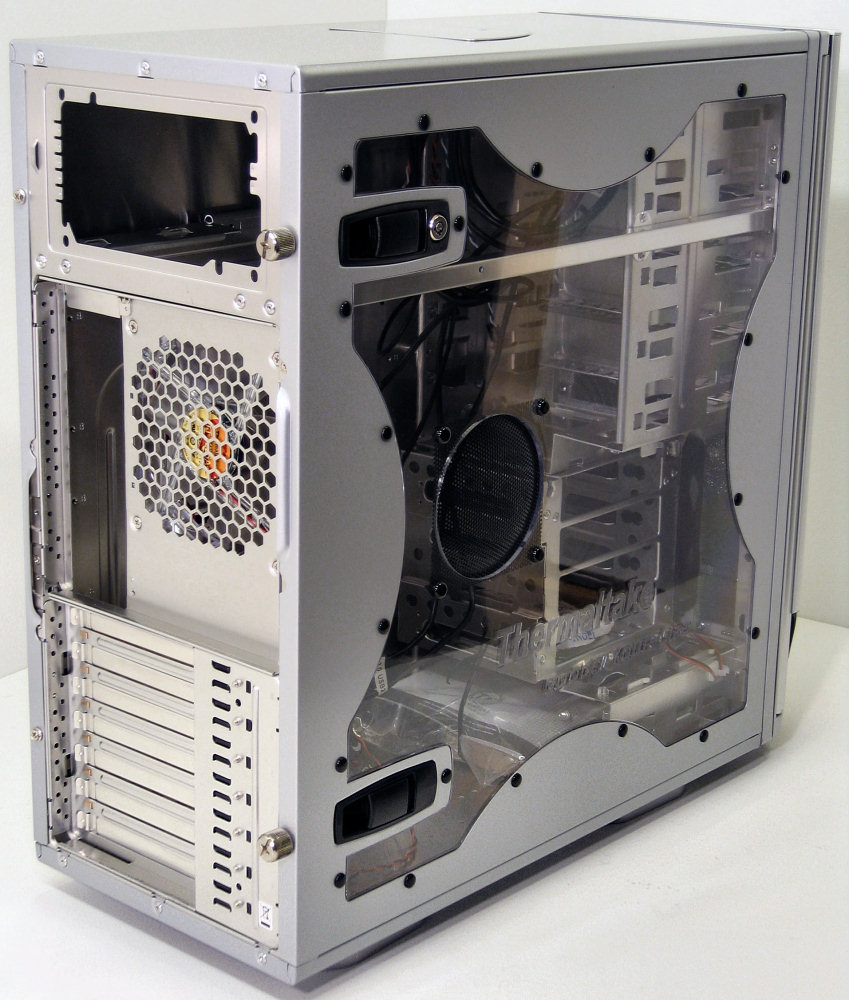
Making a welcome re-appearance, the famously easy to use Thermaltake "handscrews" show up again holding the side panel in place, but they're entirely optional given the decently strong keyed latches at the top and bottom of the panel. The back panel itself is actually two pieces which are each removable and re-configurable to allow BTX motherboards to work as well, keeping this case's prospective audience nice and large.
As for the bottom, the Aguila also has the telltale Thermaltake rotatable feet, and in addition to the area behind the door there is also ventilation holes on the bottom of the case. Now let's take a closer look at the inside of the Aguila.
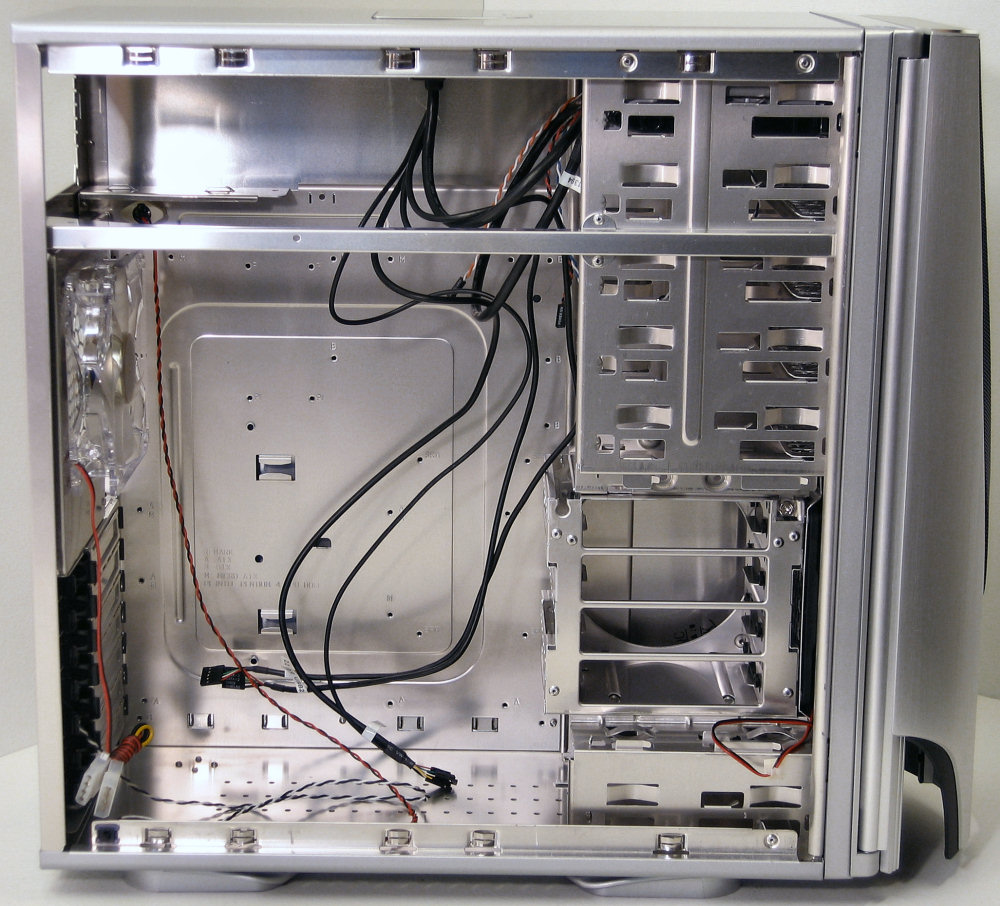
In terms of overall size, the Aguila proves to be just big enough for a full ATX system, which will appeal to anyone who has only a small area to work or needs to transport the machine a lot.
Hard drives in the Aguila mount sideways like the Eureka's, but they're in a removable cage like the Eclipse's that first locks into place and is then secured with a single case screw. In practice the cage was easy to use and the drives stayed quiet thanks to the rubber grommet mounts.
Unlike many of the more compact cases, this cage holds four drives instead of three, but that's still one less than the Eclipse's five. The bay under the hard drive cage is great for tucking extra cables or putting in one of Thermaltake's 5.25" "accessory trays". Speaking of 5.25" drives, let's look a little closer at the optical drive installation.
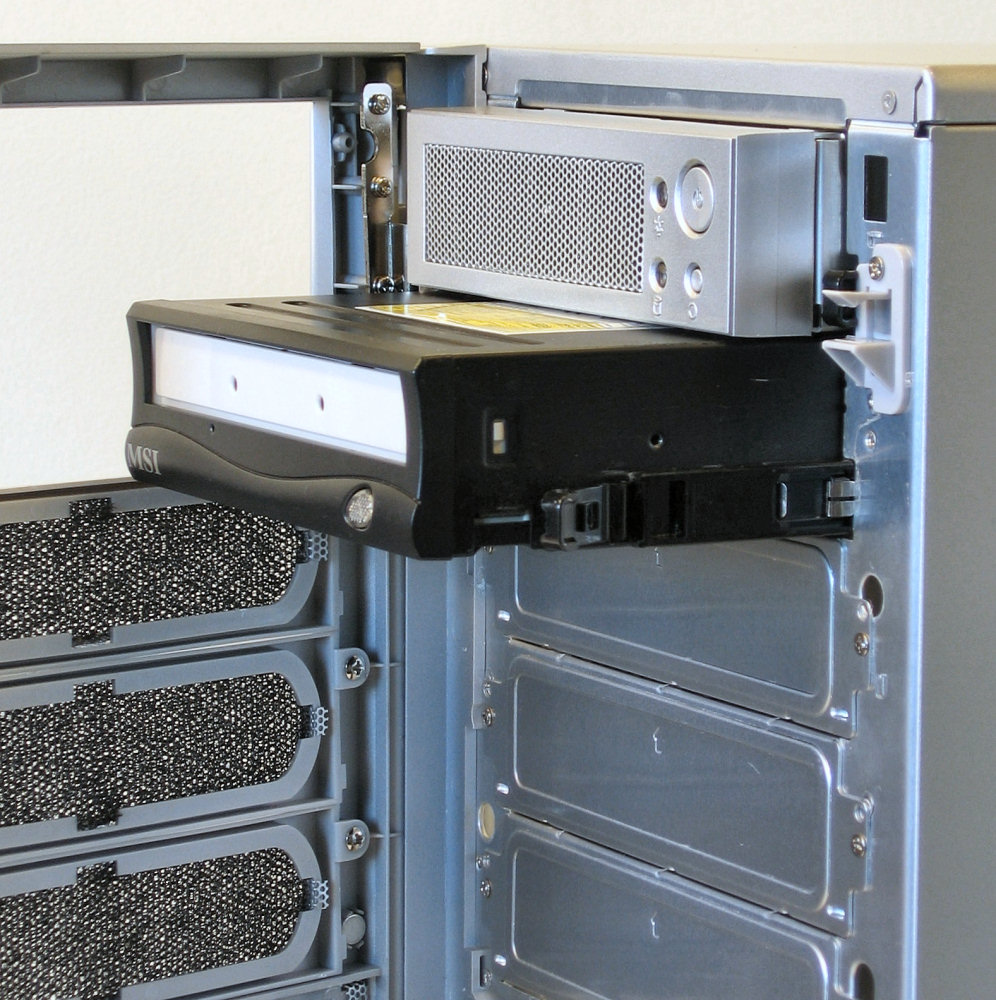
The Aguila supplies plastic and steel rails that friction-mount to each optical drive to be installed. These rails helped our drive (which unfortunately has been missing its tray cover for a while now) slide in very easily and lock in place securely. While playing around with the different drive configurations, we decided to try moving the front door to the right hinge entirely, and this proved very simple.
In addition we tried the vertical 5.25" bay just for fit, and while it was a little tight it certainly worked. Note that this pretty much kills the usefulness of the hard drive cage, but there is one free 3.5" bay in the included power / reset bay, so if one only has a single hard drive they could certainly use the vertical mount if they chose.
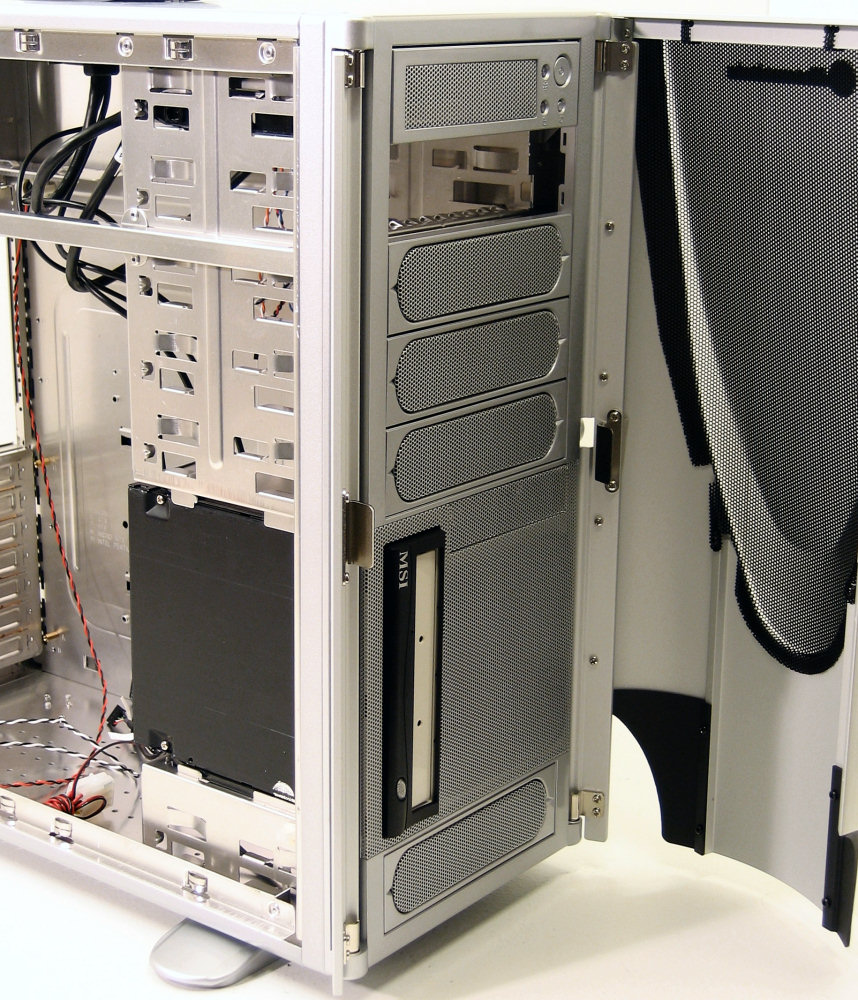
Without the door attached at all, the Aguila still looks very nice, resembling the latest Mac computer with the similar perforated look, or the Armor with simply smaller flaps. Again though, these can be removed completely if desired with a standard Phillips screwdriver.
Making a welcome re-appearance, the famously easy to use Thermaltake "handscrews" show up again holding the side panel in place, but they're entirely optional given the decently strong keyed latches at the top and bottom of the panel. The back panel itself is actually two pieces which are each removable and re-configurable to allow BTX motherboards to work as well, keeping this case's prospective audience nice and large.
 |
| Click to enlarge |
As for the bottom, the Aguila also has the telltale Thermaltake rotatable feet, and in addition to the area behind the door there is also ventilation holes on the bottom of the case. Now let's take a closer look at the inside of the Aguila.
 |
| Click to enlarge |
In terms of overall size, the Aguila proves to be just big enough for a full ATX system, which will appeal to anyone who has only a small area to work or needs to transport the machine a lot.
 |
| Click to enlarge |
Hard drives in the Aguila mount sideways like the Eureka's, but they're in a removable cage like the Eclipse's that first locks into place and is then secured with a single case screw. In practice the cage was easy to use and the drives stayed quiet thanks to the rubber grommet mounts.
 |
| Click to enlarge |
Unlike many of the more compact cases, this cage holds four drives instead of three, but that's still one less than the Eclipse's five. The bay under the hard drive cage is great for tucking extra cables or putting in one of Thermaltake's 5.25" "accessory trays". Speaking of 5.25" drives, let's look a little closer at the optical drive installation.
 |
| Click to enlarge |
The Aguila supplies plastic and steel rails that friction-mount to each optical drive to be installed. These rails helped our drive (which unfortunately has been missing its tray cover for a while now) slide in very easily and lock in place securely. While playing around with the different drive configurations, we decided to try moving the front door to the right hinge entirely, and this proved very simple.
 |
| Click to enlarge |
In addition we tried the vertical 5.25" bay just for fit, and while it was a little tight it certainly worked. Note that this pretty much kills the usefulness of the hard drive cage, but there is one free 3.5" bay in the included power / reset bay, so if one only has a single hard drive they could certainly use the vertical mount if they chose.
 |
| Click to enlarge |
Without the door attached at all, the Aguila still looks very nice, resembling the latest Mac computer with the similar perforated look, or the Armor with simply smaller flaps. Again though, these can be removed completely if desired with a standard Phillips screwdriver.


43 Comments
View All Comments
mostlyprudent - Wednesday, August 16, 2006 - link
I have been wrestling over the case issue recently. I like the looks of the Antec P150, but need door to keep the kids from turning off the PC at random. I like the P180, but it's too big. I've considered the Sonata II, but want a different PSU. Any idea how the Aguila compares performance-wise to the Antec cases?KorruptioN - Wednesday, August 16, 2006 - link
Consider the Antec SLK3000B. No PSU, is decently quiet, very cheap, comes with a door (no lock though), and is about an inch taller. I have one (along with the new NSK6500) and am happy with it.JoshuaBuss - Wednesday, August 16, 2006 - link
The aguila would perform right up there with a p150 in terms of thermals. the p150 would be slightly quieter stock though (assuming you set its tri-speed fans to the slowest speed)